- 28 Feb 2024
- 4 Minutes to read
- Print
- PDF
Assign labels to files
- Updated on 28 Feb 2024
- 4 Minutes to read
- Print
- PDF
With the introduction of Prisma Cloud DSPM's new label feature, you have the flexibility to label files and establish custom classifications designed to meet your unique security requirements. This includes tasks such as setting sensitivity levels, handling specific compliance and audit prerequisites, and addressing various security considerations. It is also possible to search for files according to their label and quickly create custom risks based on the custom labels.
This new feature is currently only supported at the file level, and cannot be used with databases.
When a label is created, updated, or deleted, it takes a few minutes for the changes to be reflected in Prisma Cloud DSPM.
Labels are managed inside Prisma Cloud DSPM’s database; they are not written to the files.
The existing data type groups remain unchanged, but their name is updated to "Labels."
If a user opts to utilize an existing label, such as "PII," the new rules associated with this label will expand the existing data linked to it, meaning all the data types previously associated with PII will now be encompassed by the new rules.
Use Case Examples
Assign sensitivity levels to files
Depending on the content of a file, you can now designate a file as "Very Sensitive”, “Sensitive” or “Not Sensitive”.
In essence, the labels feature provides a customizable tagging system, allowing you to categorize and manage the sensitivity of files based on the language or content used within your company.
Create custom classifications tailored to specific security needs
Creating custom classifications tailored to your specific security needs involves leveraging information from Prisma Cloud DSPM's predefined classifications (Data Types) and integrating them with additional filters related to file metadata or other configuration parameters. For example, you can create a custom filter that combines the “Is public” (open to the Internet) filter with specific metadata, such as “Privacy” within the file. By doing so, you can then label the file according to a specific policy under a compliance regulation, for example “GDPR”. The new label feature not only assists in presenting crucial security information but it also establishes a risk assessment based on the customized label, providing a comprehensive approach to file security.
Create a New Classification Rule
There are several options available for creating a new classification rule
Create a new classification rule in Settings
Create a new classification rule in Inventory/Findings
Create a new classification rule in Settings
Create a new classification rule in Settings and apply a label to the rule.
- In the Prisma Cloud DSPM side menu, go to Settings > Classification Rules.
- In the Classification Rules table, click Add New to open the New Classification Rule window.
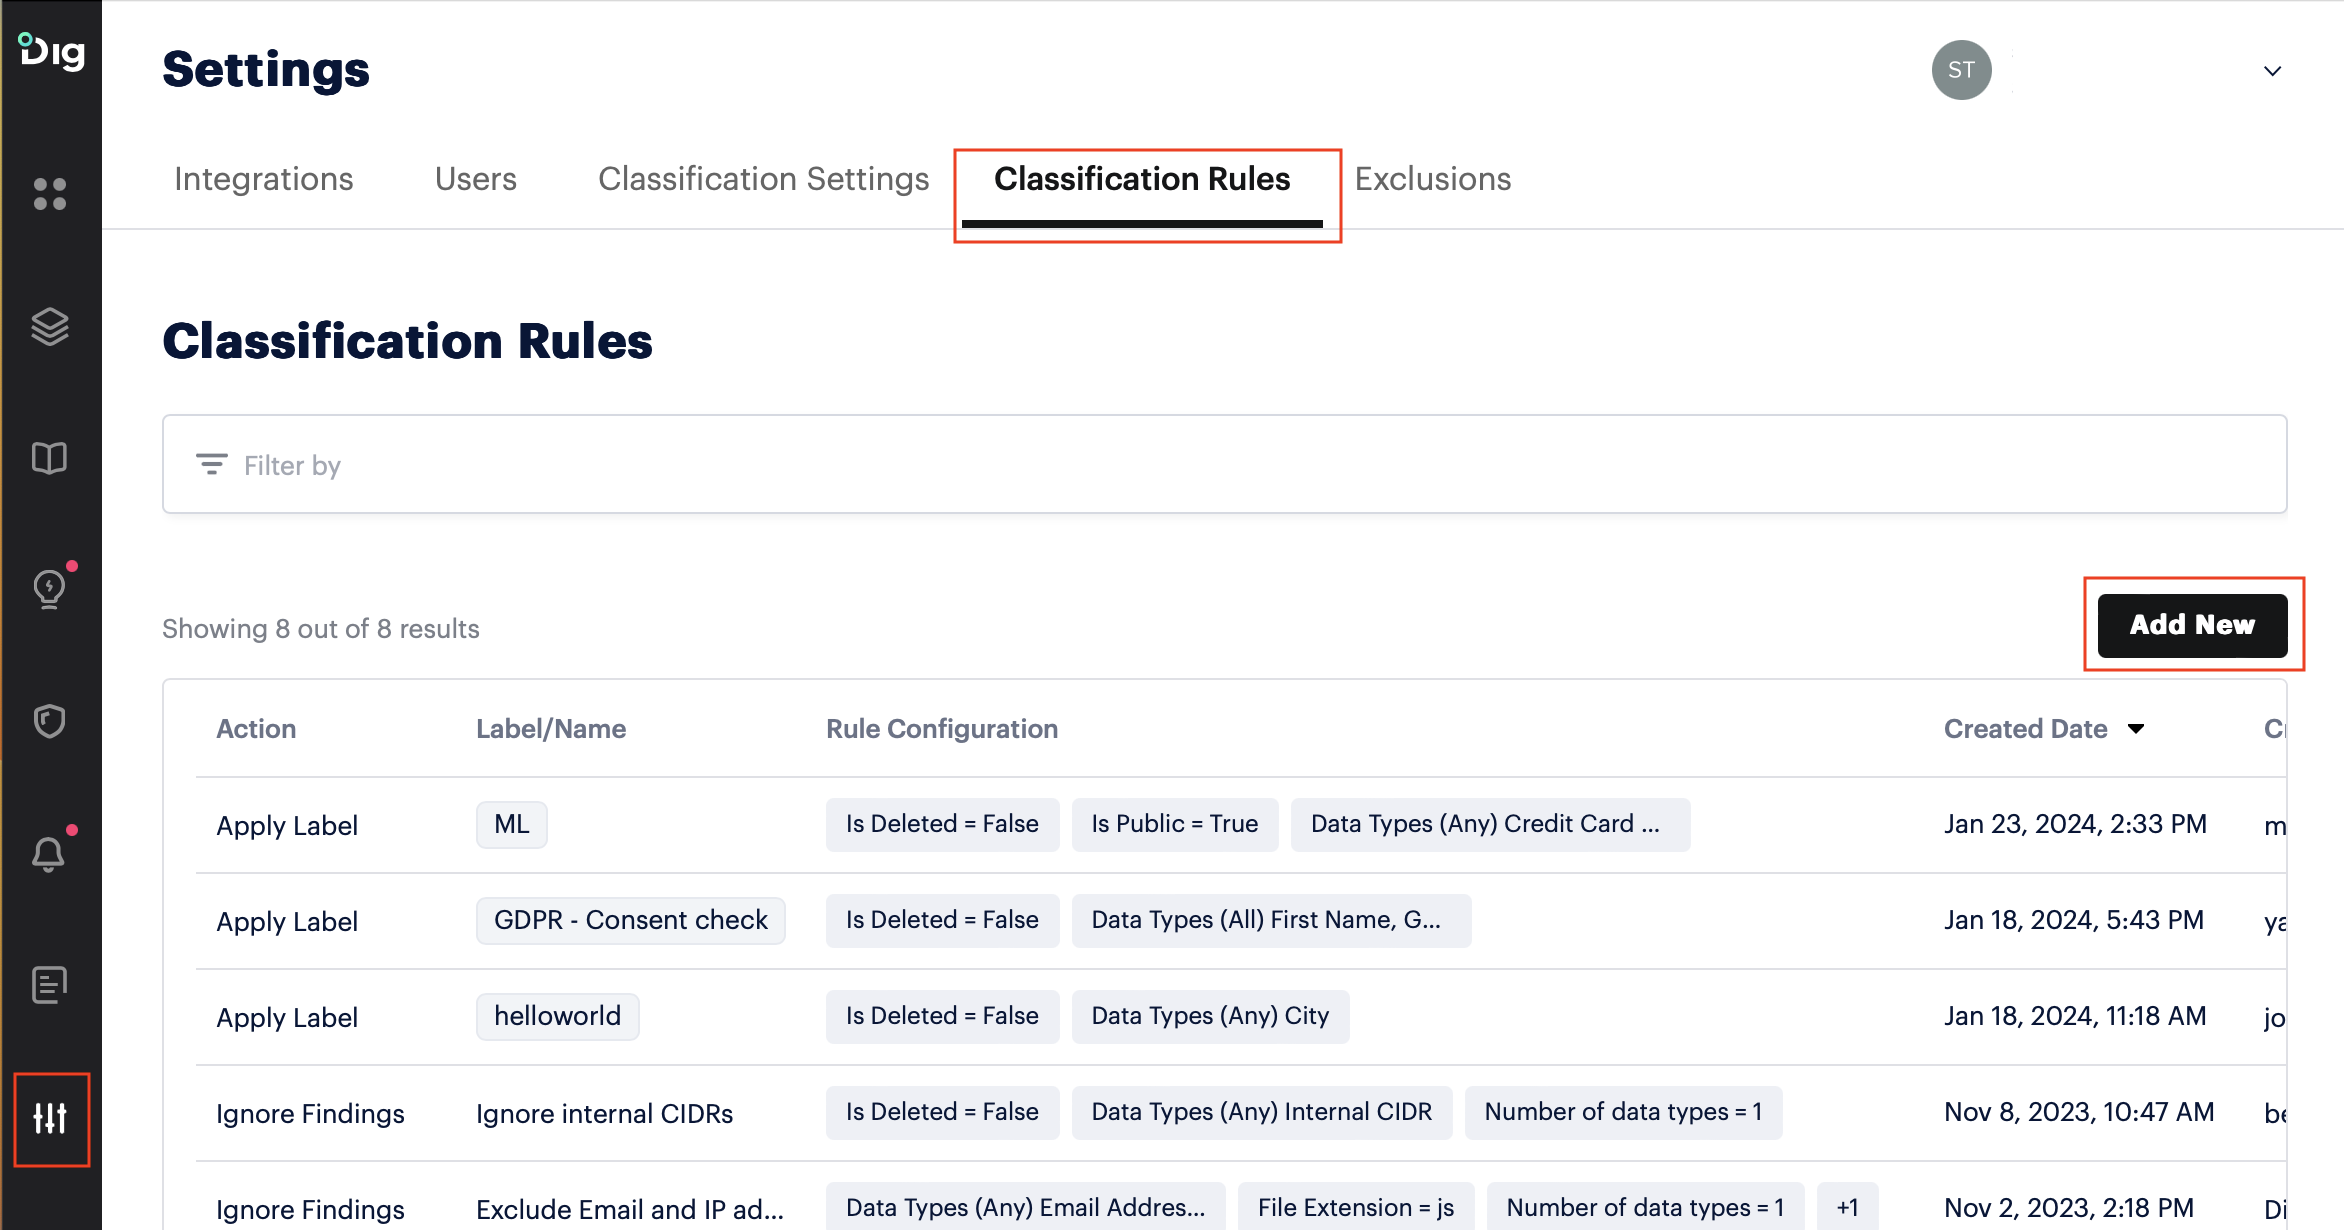
- In the Apply Label drop-down, select the action you want to apply the label to. The label will be automatically attached to files that match the configured filter.
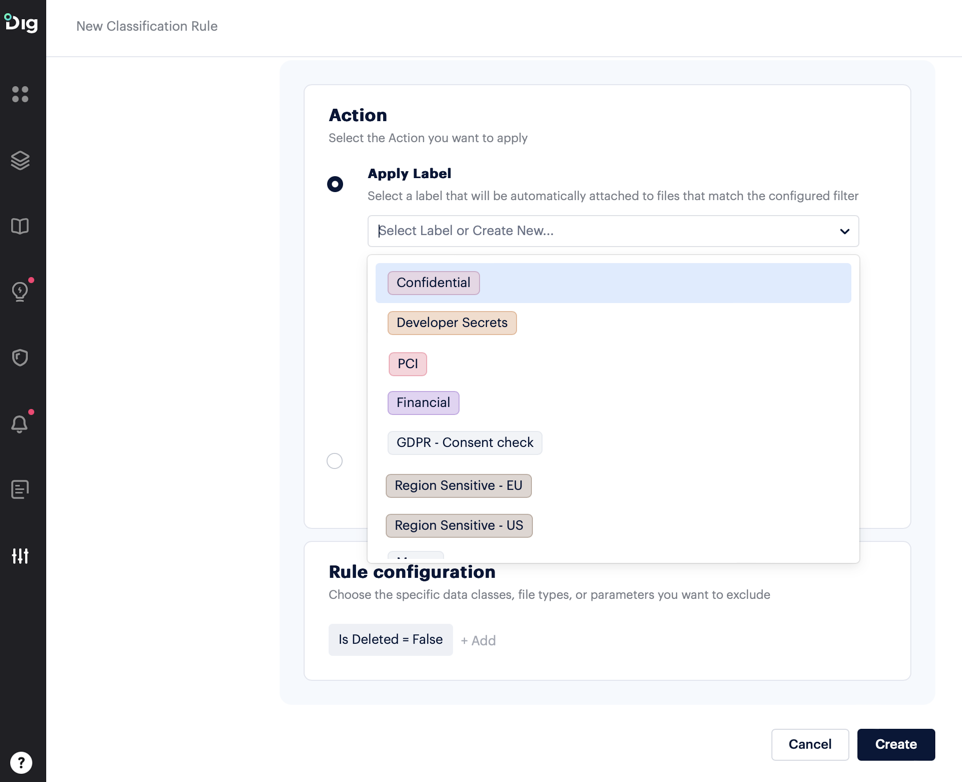
- Add an optional description about the label.
- In the Rule configuration section, choose the specific data classes, file types, or parameters you want to exclude from the Classification Rule.
- Click Create to create the rule.
Create a new classification rule in Inventory/Findings
Create a new classification rule in Inventory or Findings, and apply a label to the rule.
- In the Prisma Cloud DSPM side menu, click Inventory or Findings.
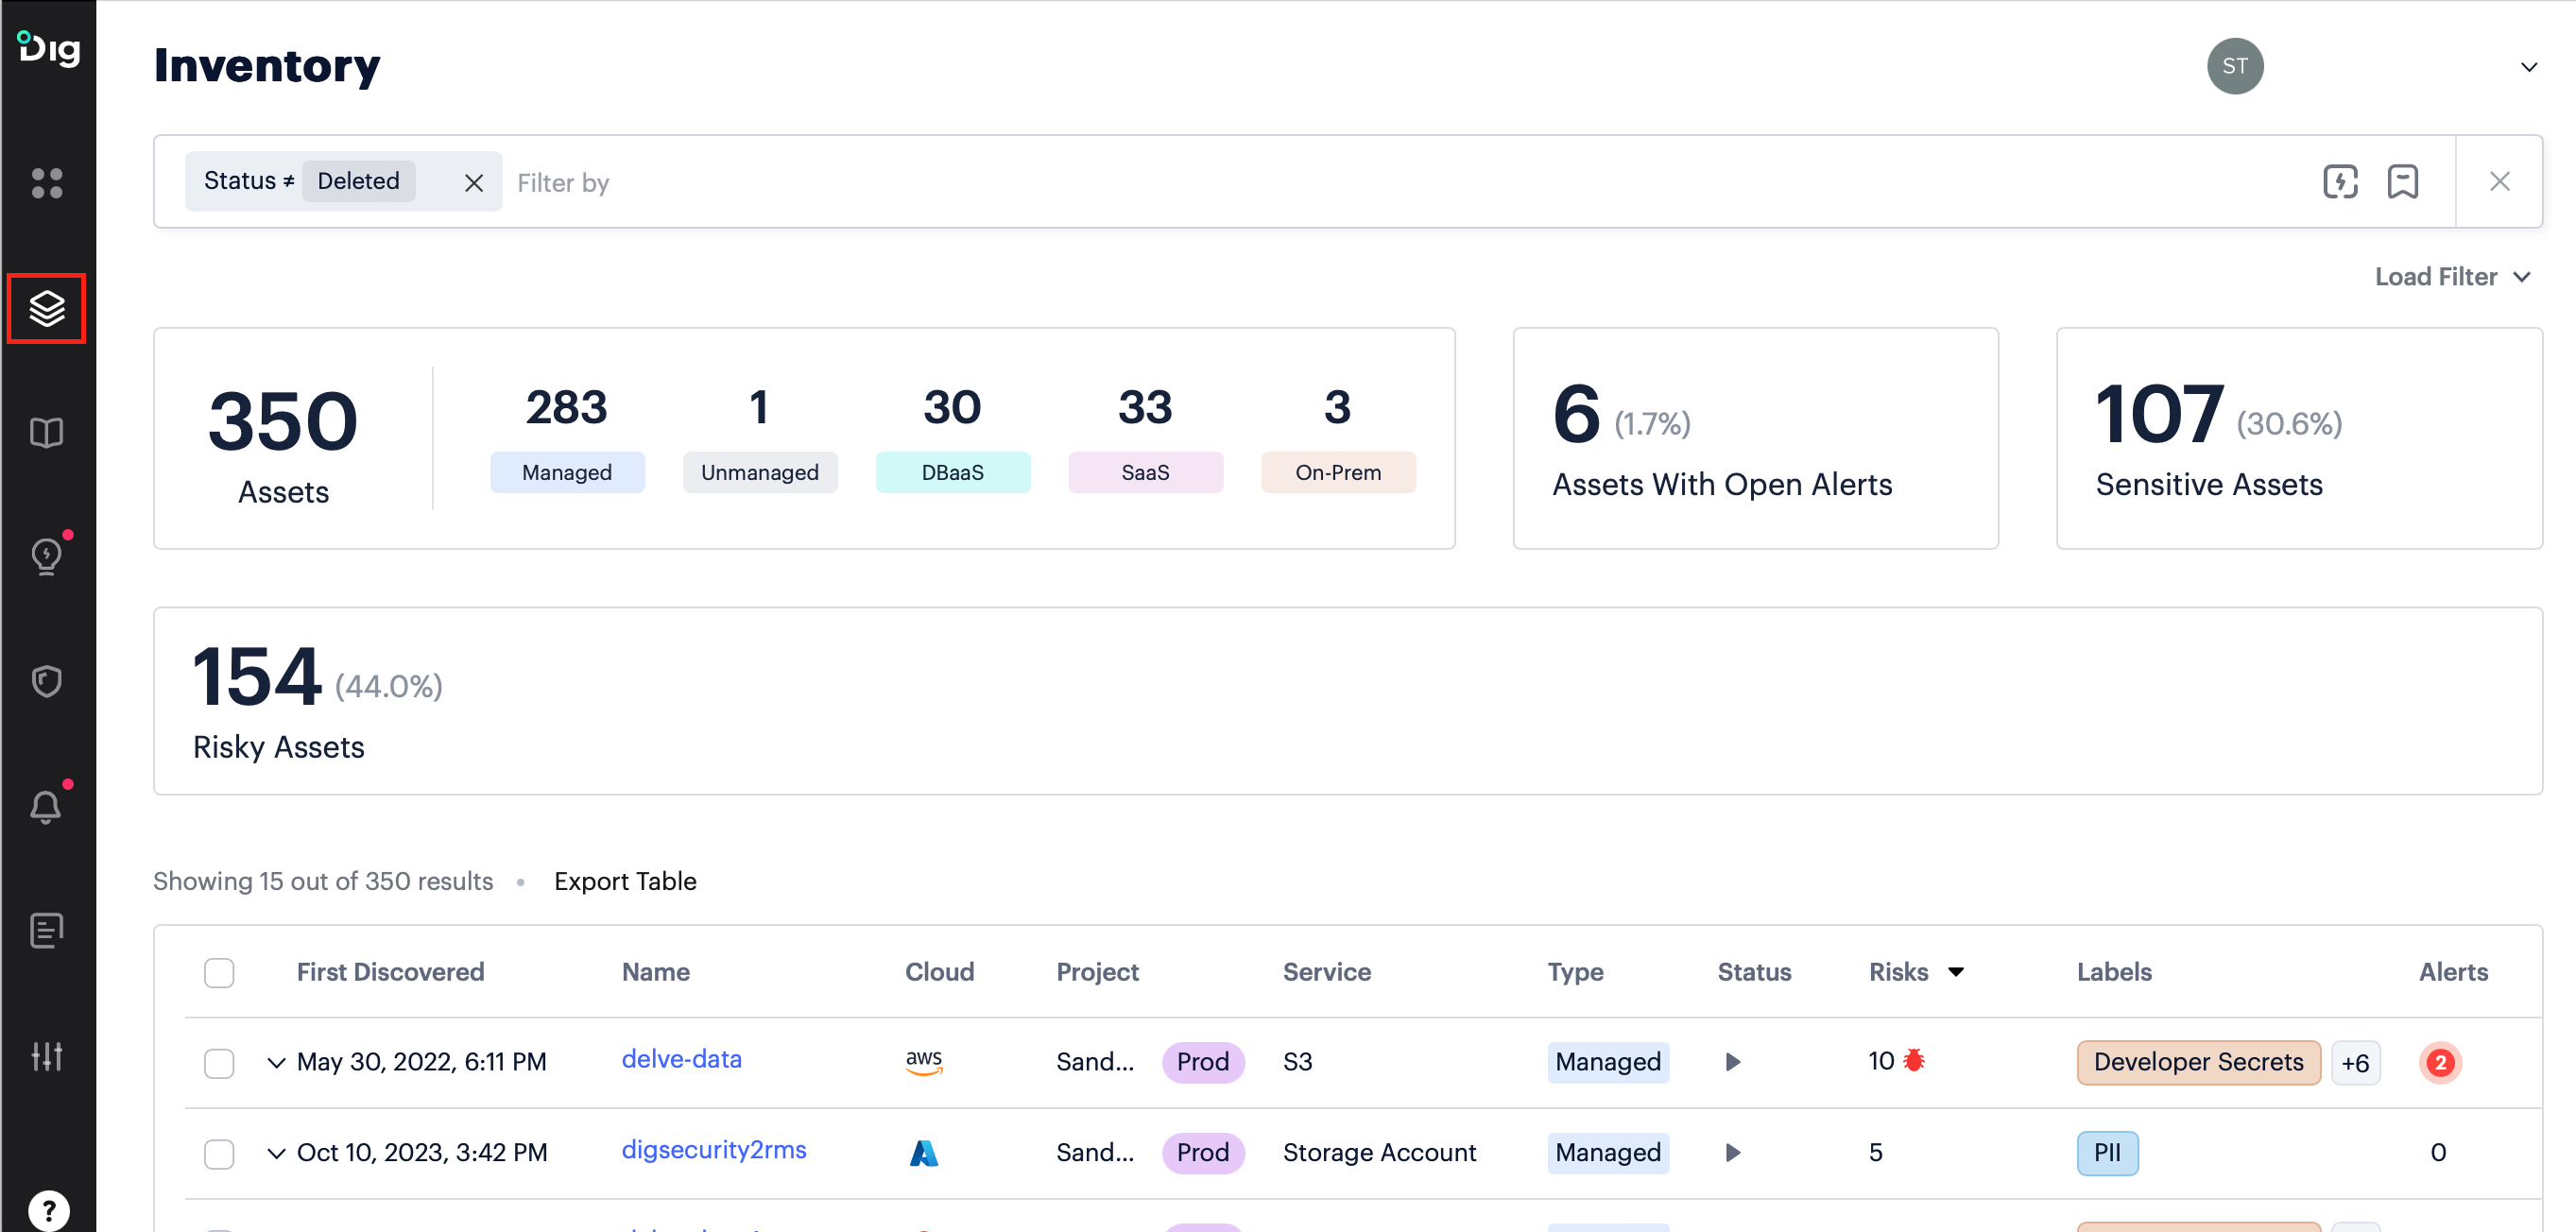
- In the Inventory table, click the name of an asset you want to add a classification rule to. The file’s details are displayed.
- Click the Findings tab.
- Add the required filters. For example, only show files denoted as “Is public” or “File type”.
- Click the New Classification Rule icon.
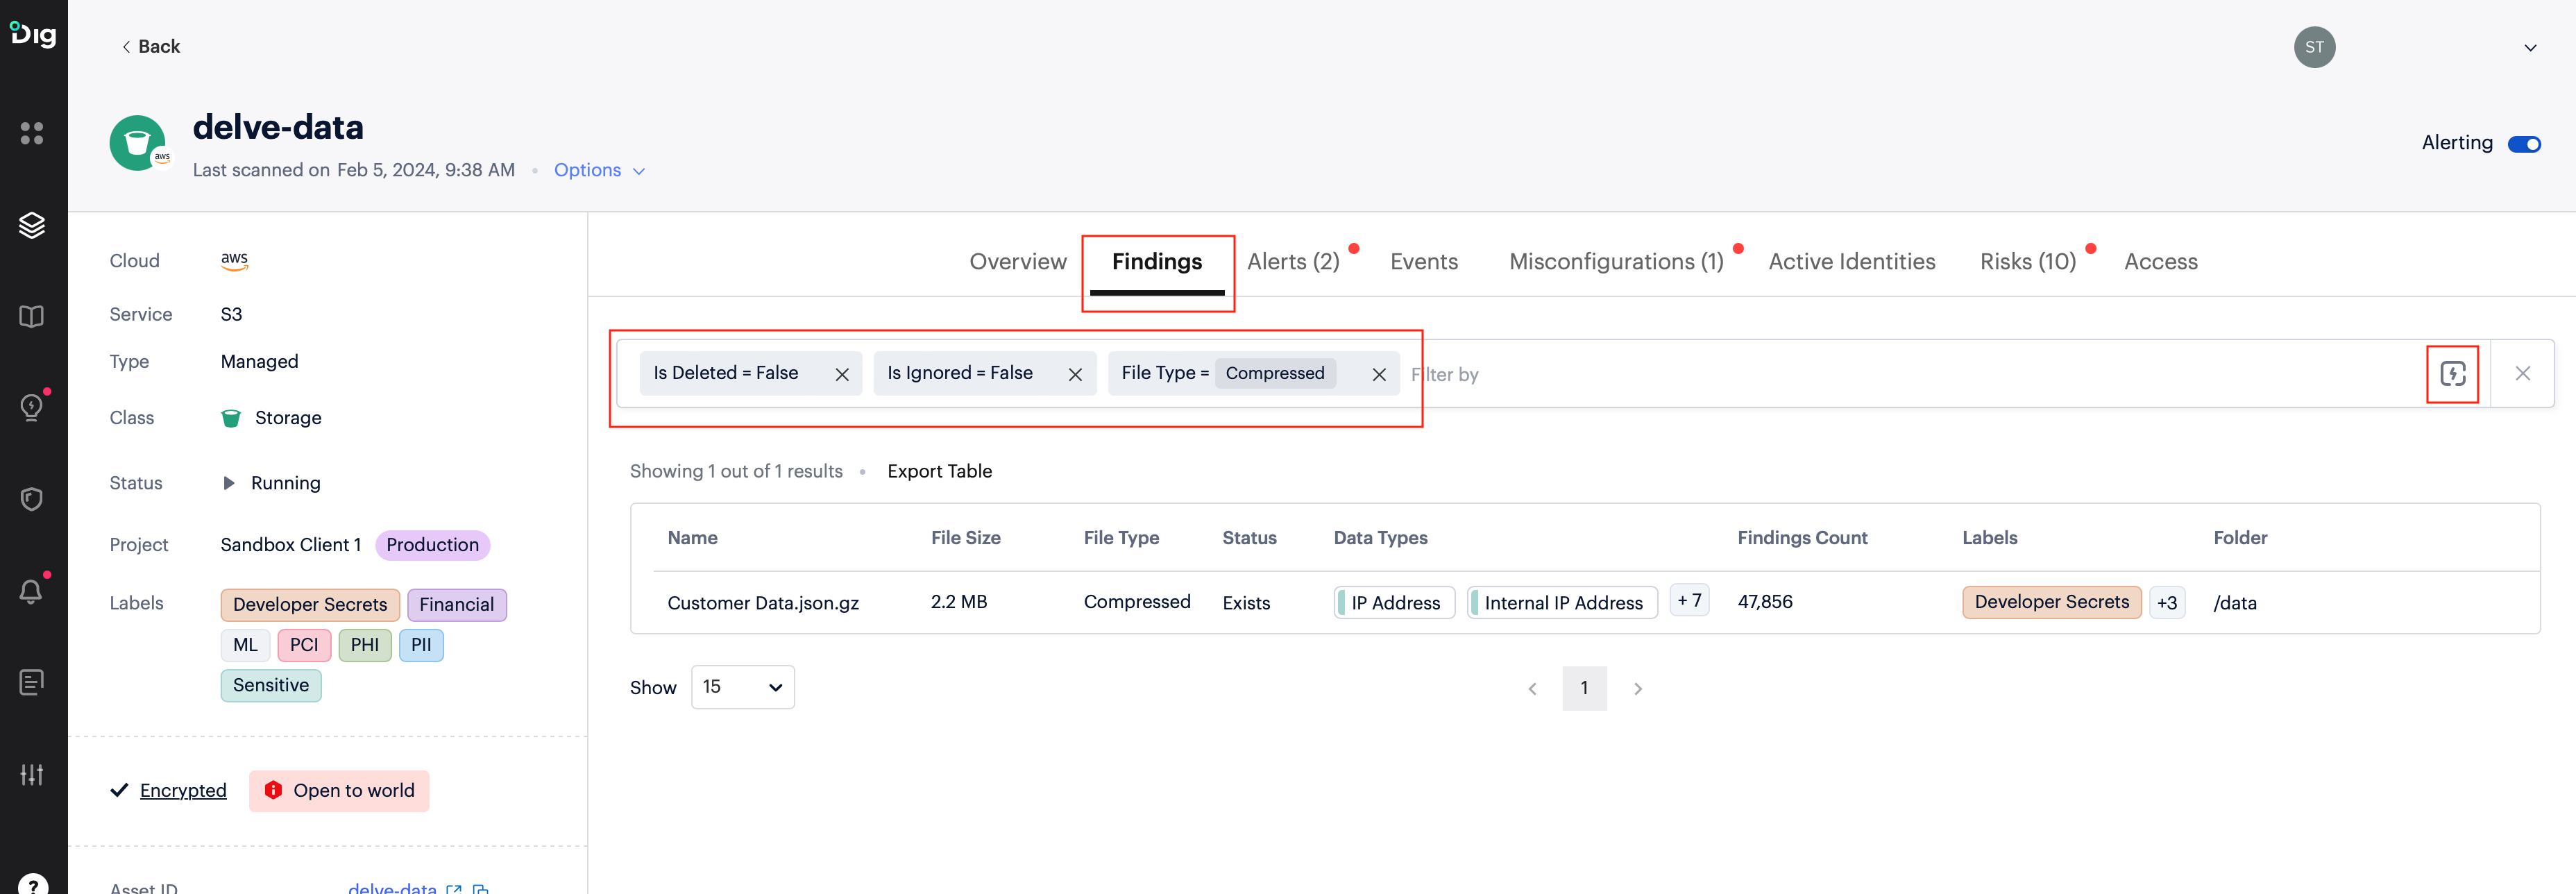 The New Classification Rule window opens and the Rule configuration section is populated with the filters selected in step 4.
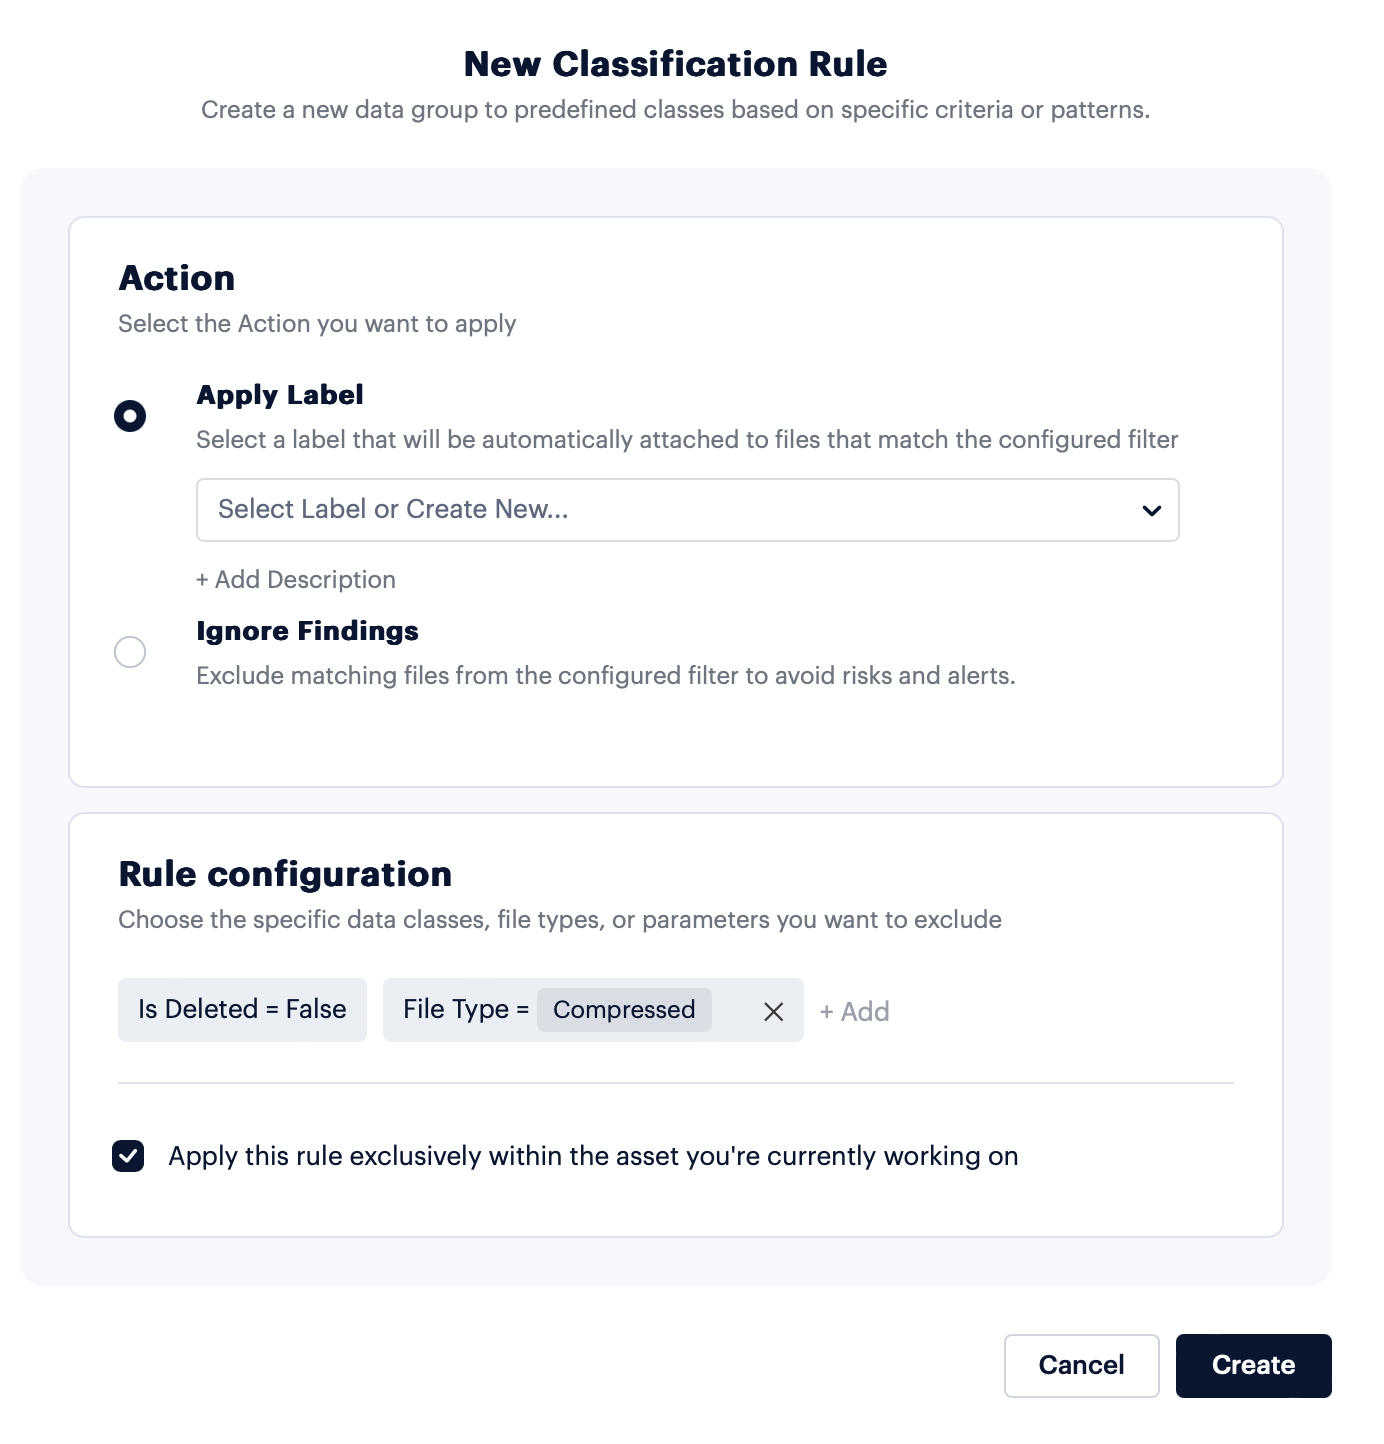
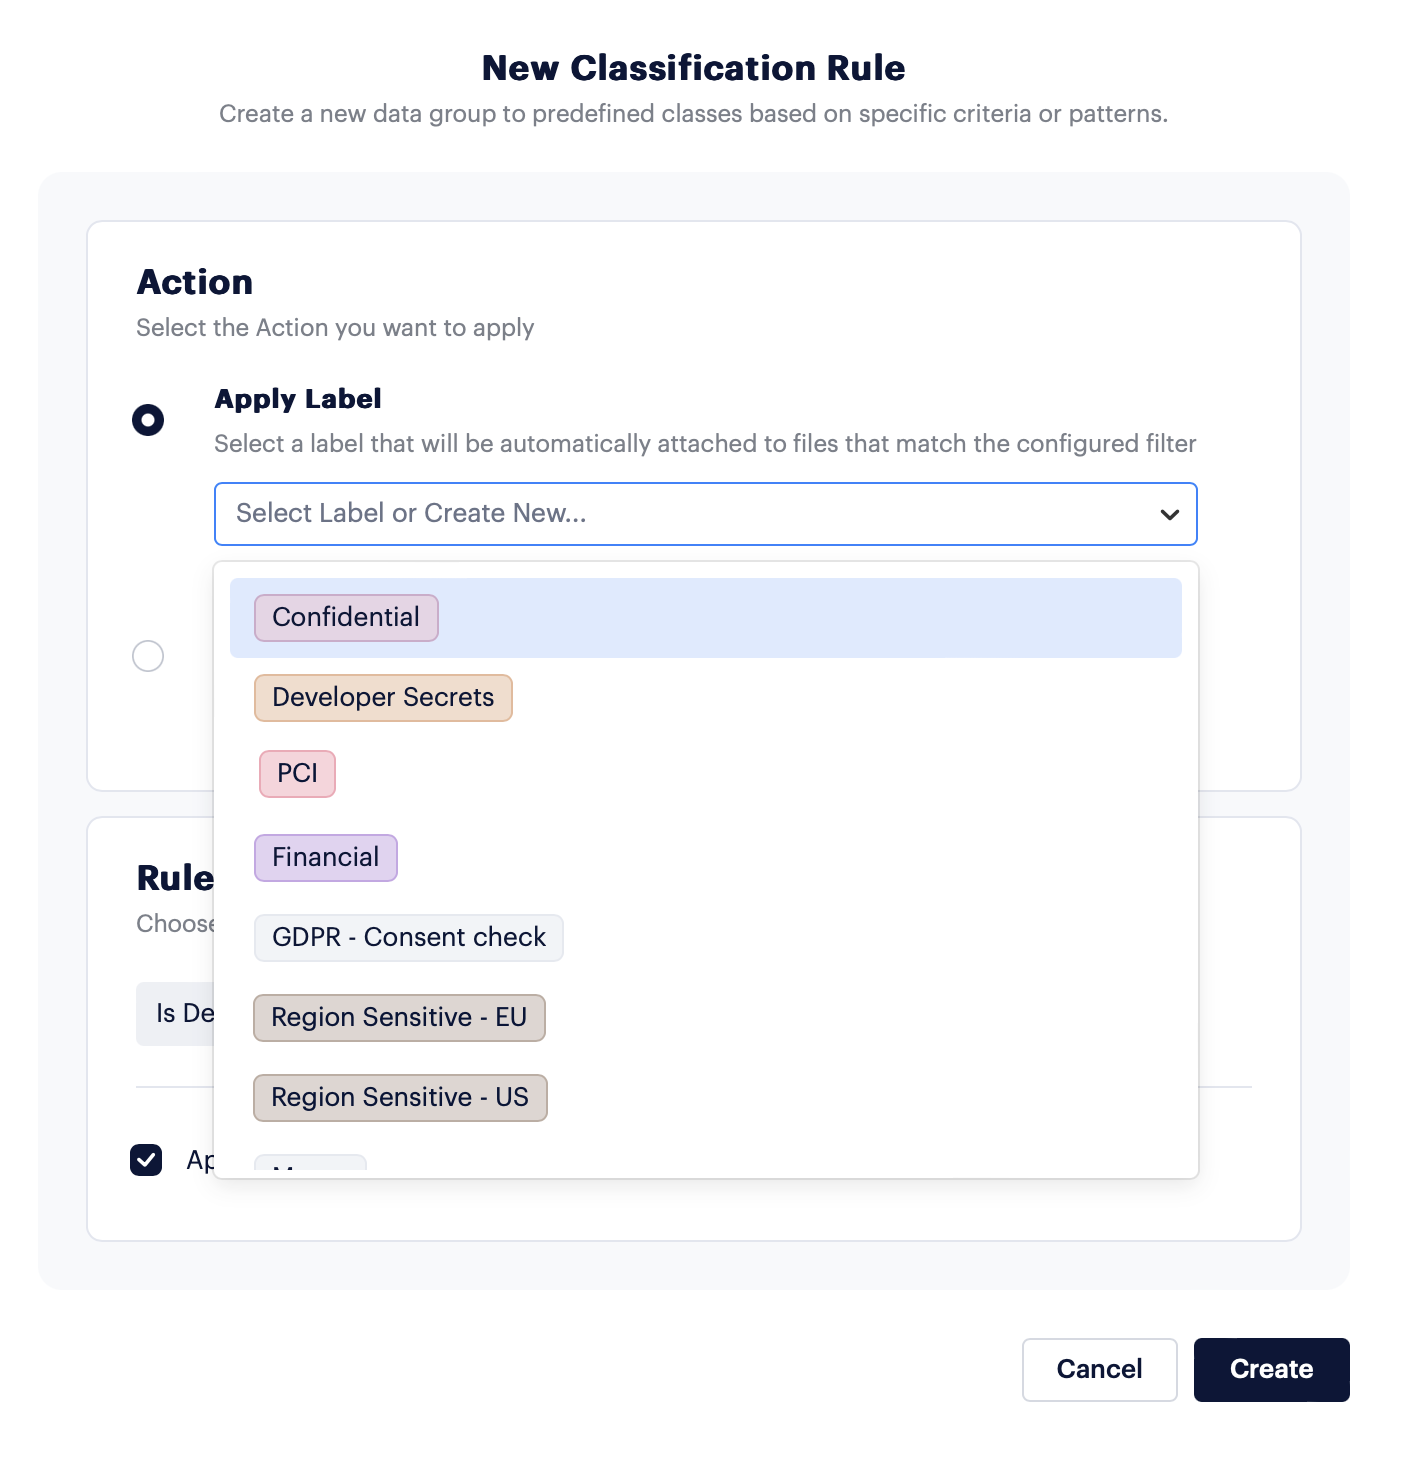
- In the Apply Label drop-down, select an existing label or create a new label. The label will be automatically attached to files that match the configured filter.
- Add an optional description about the label.
- In the Rule configuration section, choose the specific data classes, file types, or parameters you want to exclude from the Classification Rule.
- Click Create to create the Classification Rule.
Assign a Label to an Existing Classification Rule
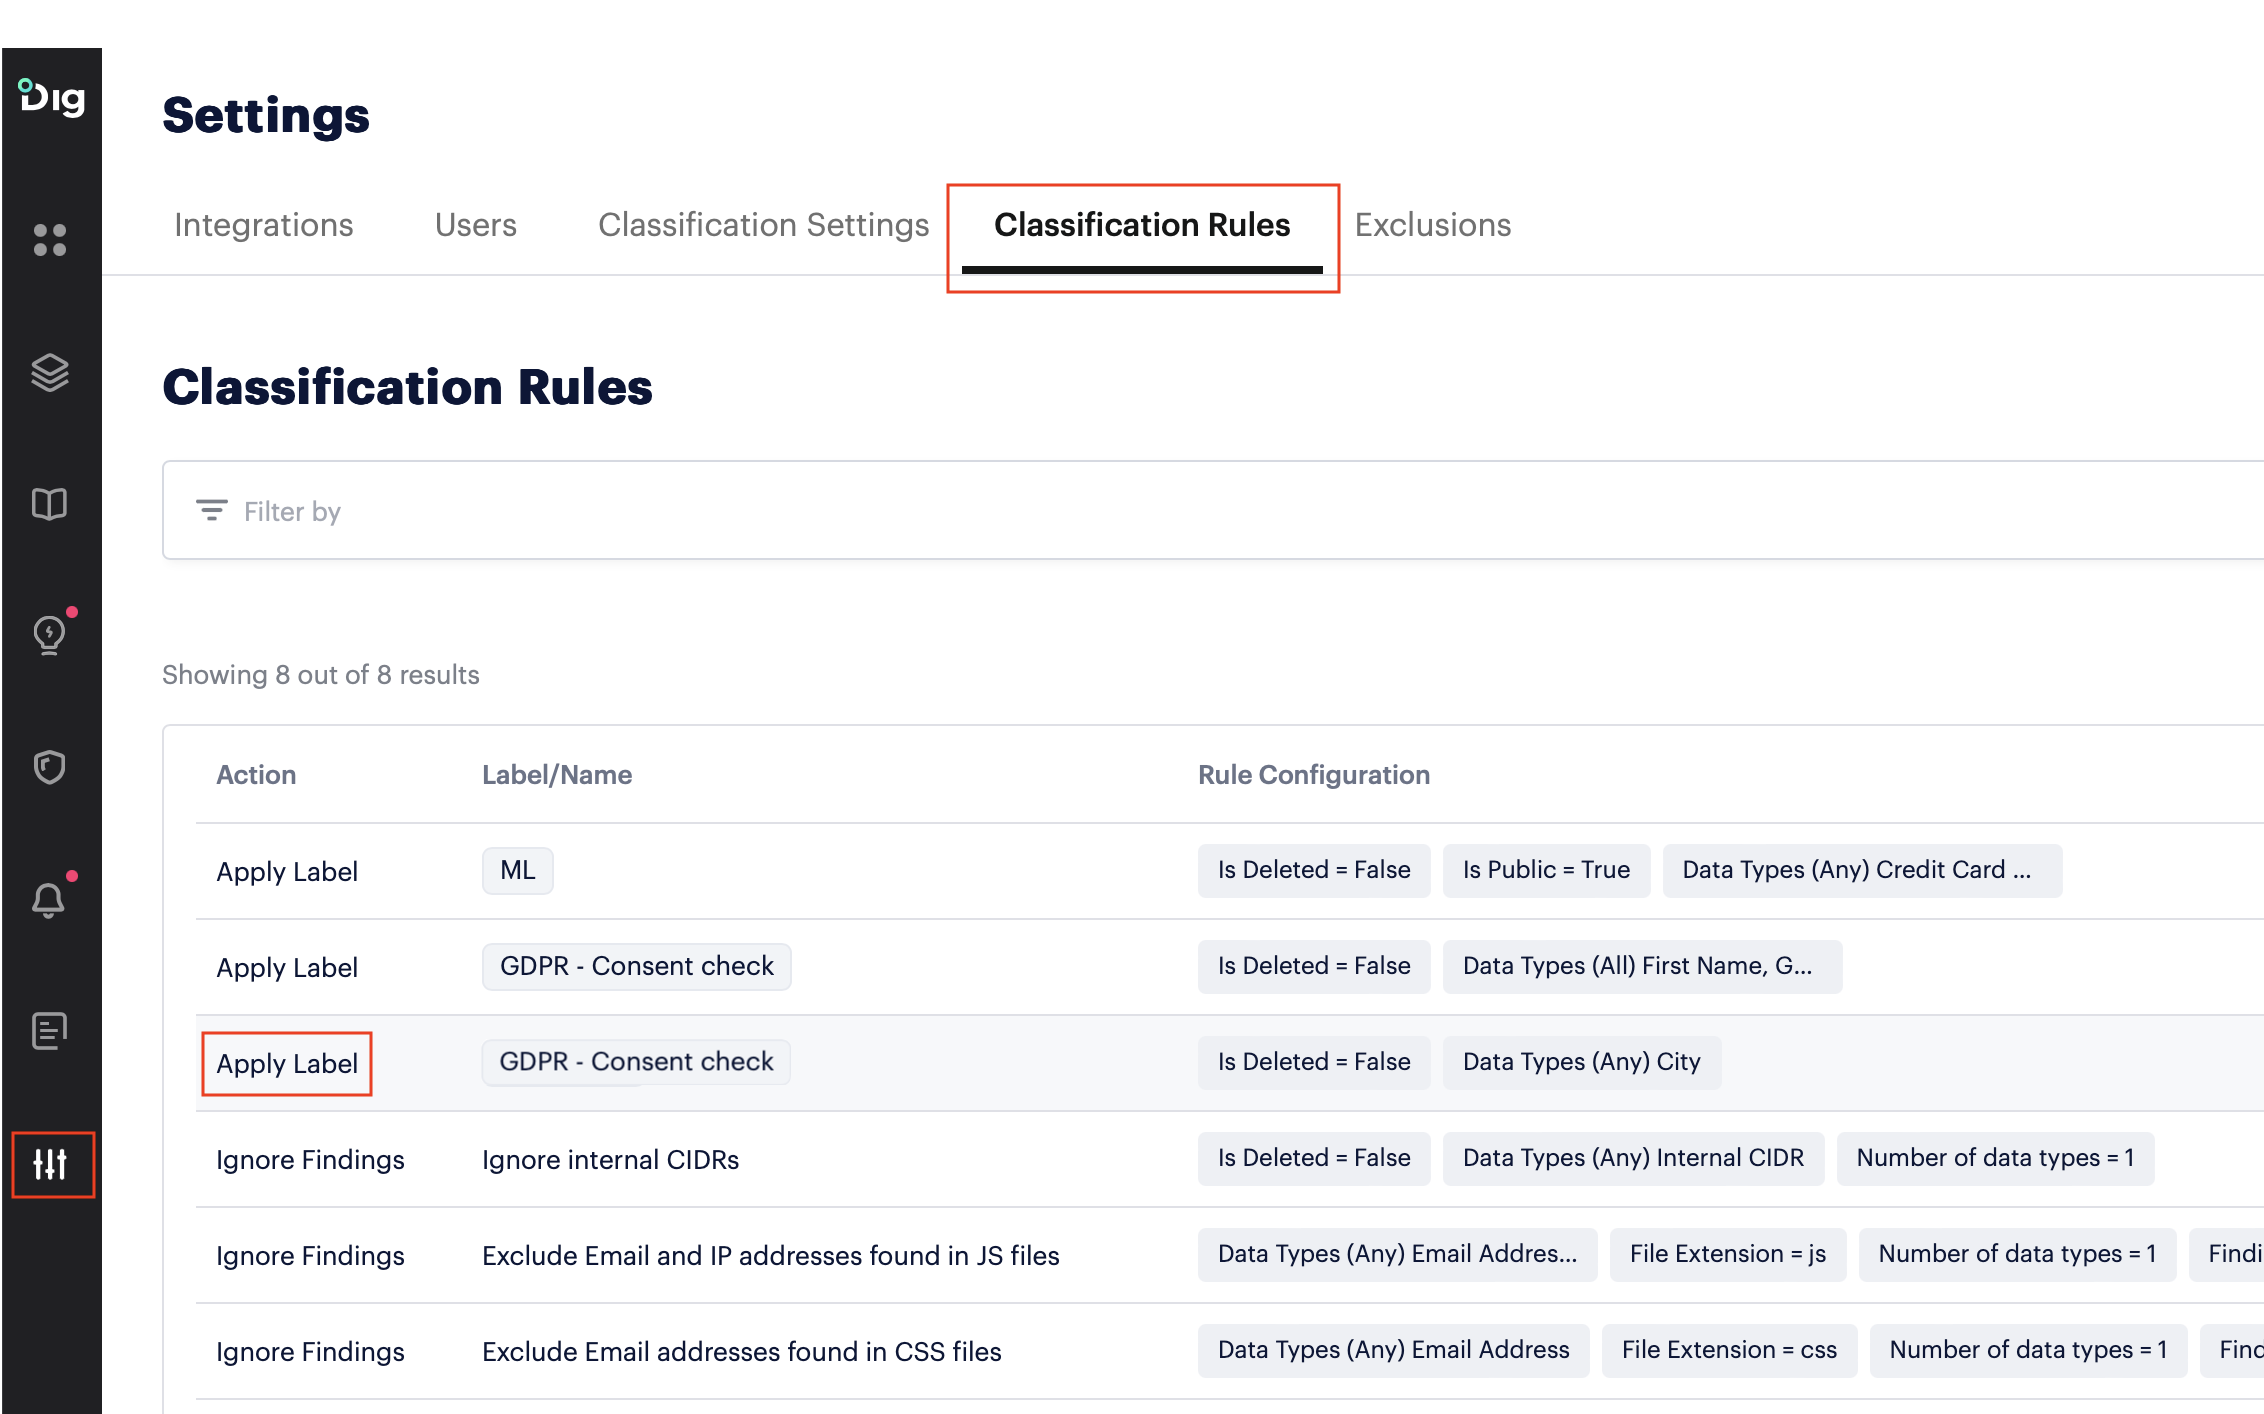
- In the Prisma Cloud DSPM side menu, go to Settings > Classification Rules.
- In the Classification Rules table, refer to the Actions column and locate a classification rule that displays the action Apply Label.
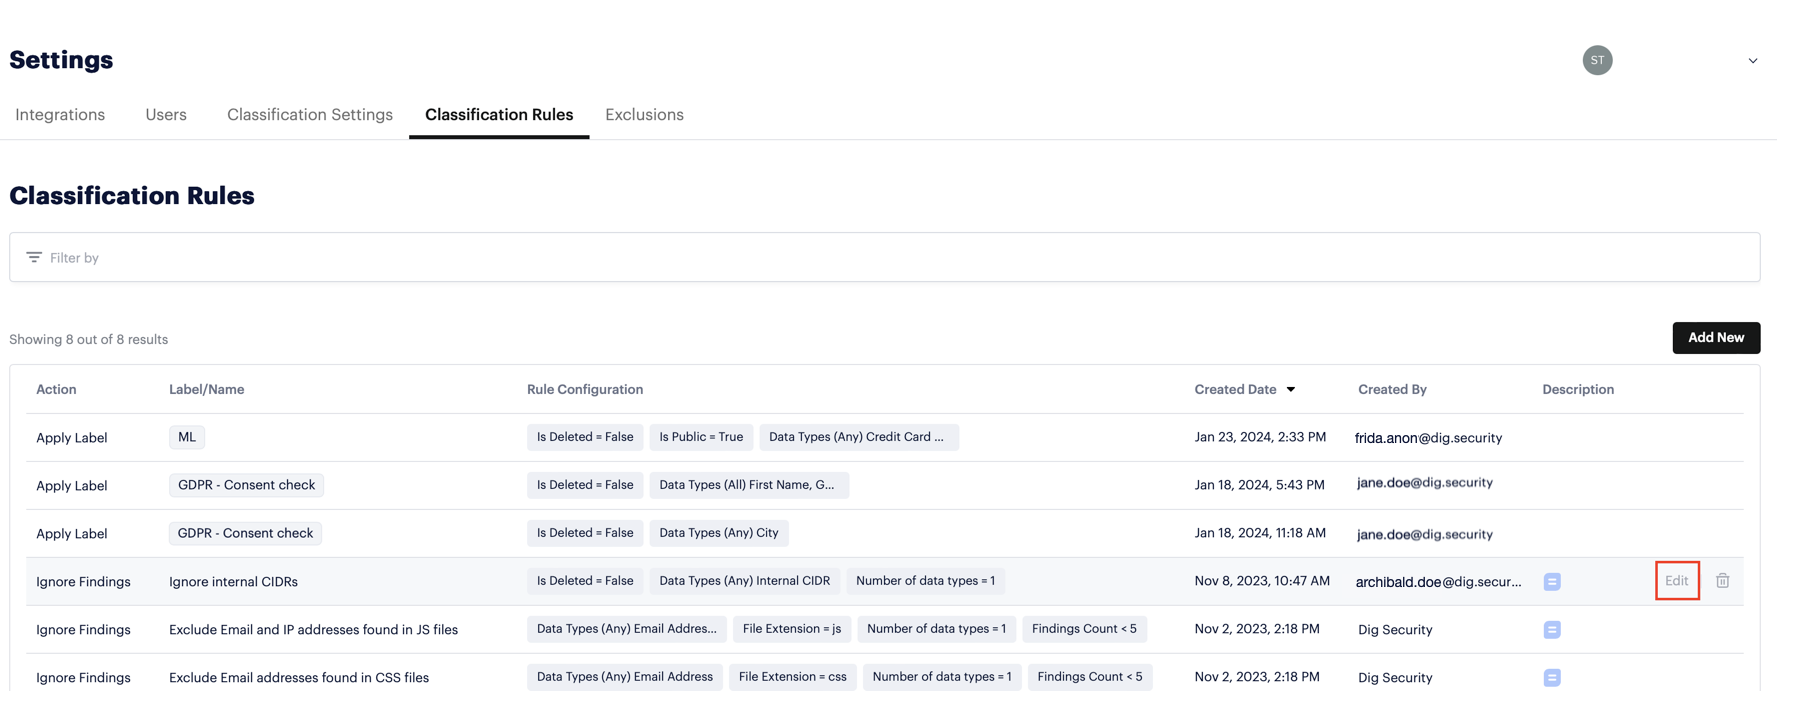
- Click the rule’s Edit button to open the Edit Classification Rule window. The Apply Label option is selected by default.
- In the Apply Label drop-down, select an appropriate preset label.
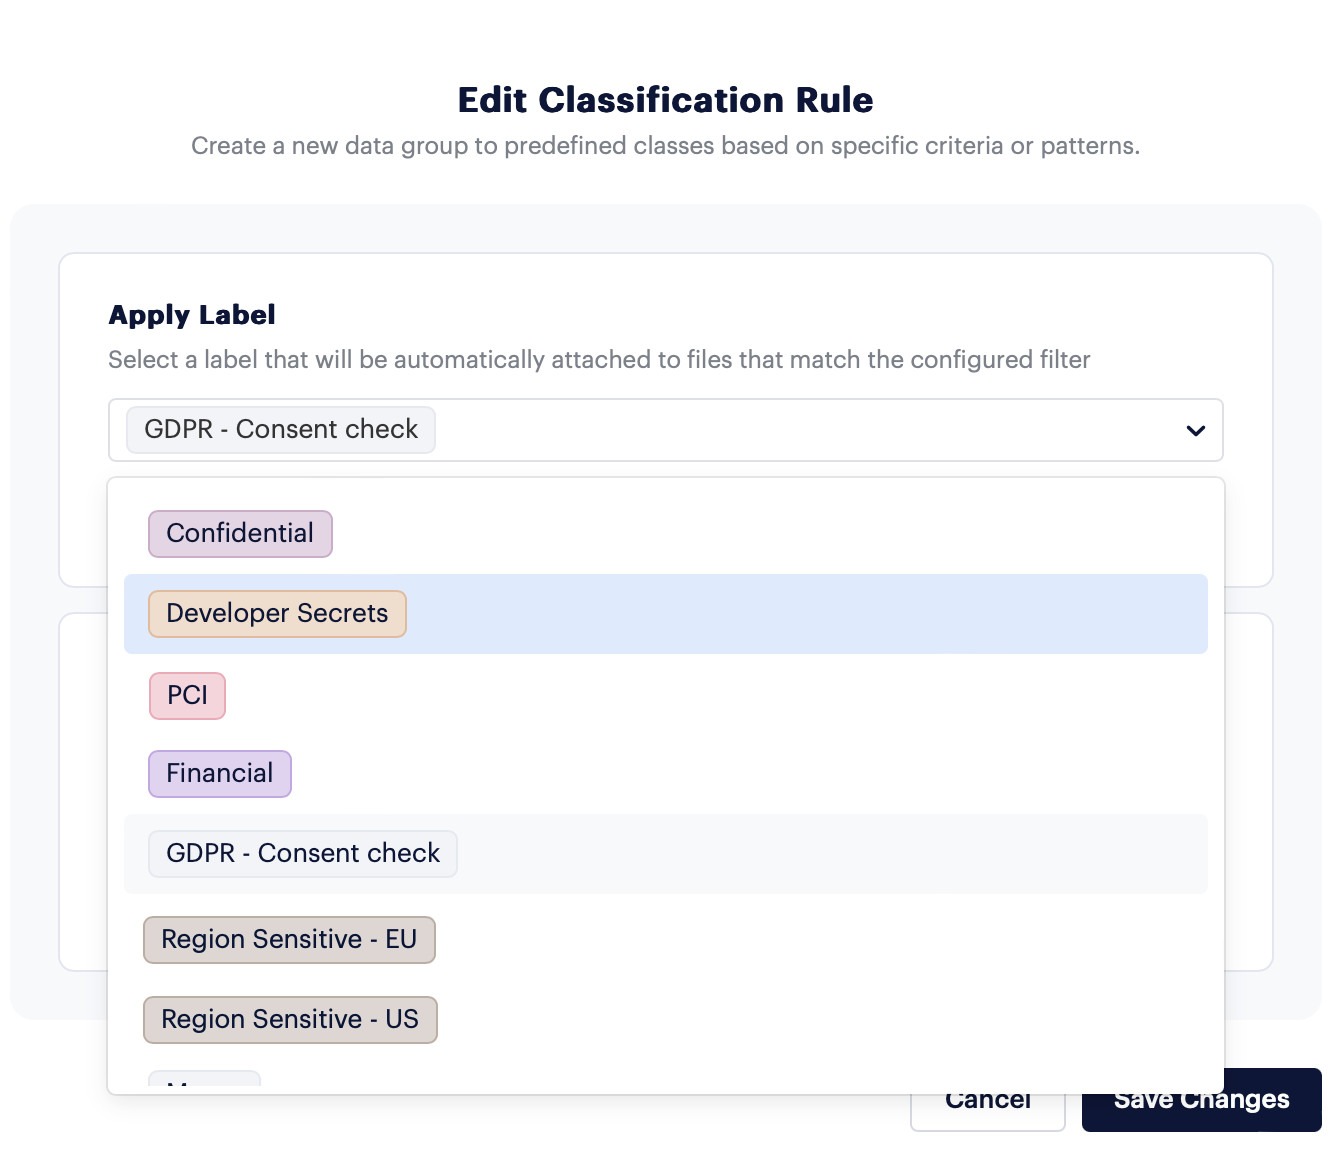 The label will be automatically attached to files that match the configured filter.
 - Add an optional description about the label.
- Click Save Changes to apply the label to the Classification Rule.
Delete a Classification Rule
- In the Prisma Cloud DSPM side menu, go to Settings > Classification Rules.
- In the Classification Rules table, click the Classification Rule you want to delete.
- Click the Delete icon, and when prompted click Delete. The Classification Rule is deleted.
.png)
Search for Findings According to Their Label
Search for files according to their label and quickly create custom risks based on the custom labels.
- In the Prisma Cloud DSPM side menu, click Findings, and go to the By File tab.
- In the Filter field, add the Labels filter.
- The Findings table updates and only displays Findings according to the selected filters.
.png)


 The New Classification Rule window opens and the Rule configuration section is populated with the filters selected in step 4.


 The label will be automatically attached to files that match the configured filter.
.png)
.png)