- 28 Feb 2024
- 3 Minutes to read
- Print
- PDF
On-premise File Shares
- Updated on 28 Feb 2024
- 3 Minutes to read
- Print
- PDF
Prerequisites
Prisma Cloud DSPM requires network connectivity to access and classify data stored in the file share. There are two primary methods for establishing this connectivity:
Over the internet, which is easier to set up.
Peering, which offers a more secure connection.
In addition to ensuring network connectivity, Prisma Cloud DSPM requires a user account within the Active Directory (AD) domain associated with the file share. During the onboarding process in the Prisma Cloud DSPM interface, users are prompted to input the relevant username and generate a cloud secret to securely store the associated password. This step is crucial for seamless integration and efficient functioning of Prisma Cloud DSPM in accessing and organizing data.
Access instructions for both methods are provided below:
For AWS Based Orchestrators
Enable internet access using the orchestrator IP
Navigate to the AWS console in the orchestrator account.
Choose the desired region for the connection.
Access EC2.
Under Network & Security, located in the left menu, go to Elastic IPs.
Identify the IP labeled Prisma-Cloud-DSPM; this is the IP that requires connectivity allowance.
Establish peering between on-premises and the VPC
Navigate to the AWS console in the orchestrator account.
Choose the desired region for the connection.
Access VPC.
Under Network & Security, located in the left menu, go to Your VPCs.
Identify the VPC CIDR of the VPC labeled Prisma-Cloud-DSPM; this is the CIDR block needed for peering.
For Azure Based Orchestrators
Enable internet access using the orchestrator IP
Navigate to the Azure portal in the orchestrator subscription.
Navigate to Resource groups and choose the one starts with "Prisma-Cloud-DSPM-security" in the desired region for the connection.
Under the list of resources, choose for the NAT gateway resource in the desired region.
Inside the NAT gateway. navigate to Outbound IP.
Identify the IP labeled Prisma-Cloud-DSPM; this is the IP that requires connectivity allowance.
Establish peering between on-premises and the Vnet
Navigate to the Azure portal in the orchestrator subscription.
Navigate to Resource groups and choose the one starts with "Prisma-Cloud-DSPM" in the desired region for the connection.
Under the list of resources, choose the virtual network in the desired region.
Create the peering between the Vnet to the on-prem network.
On-premise File Shares
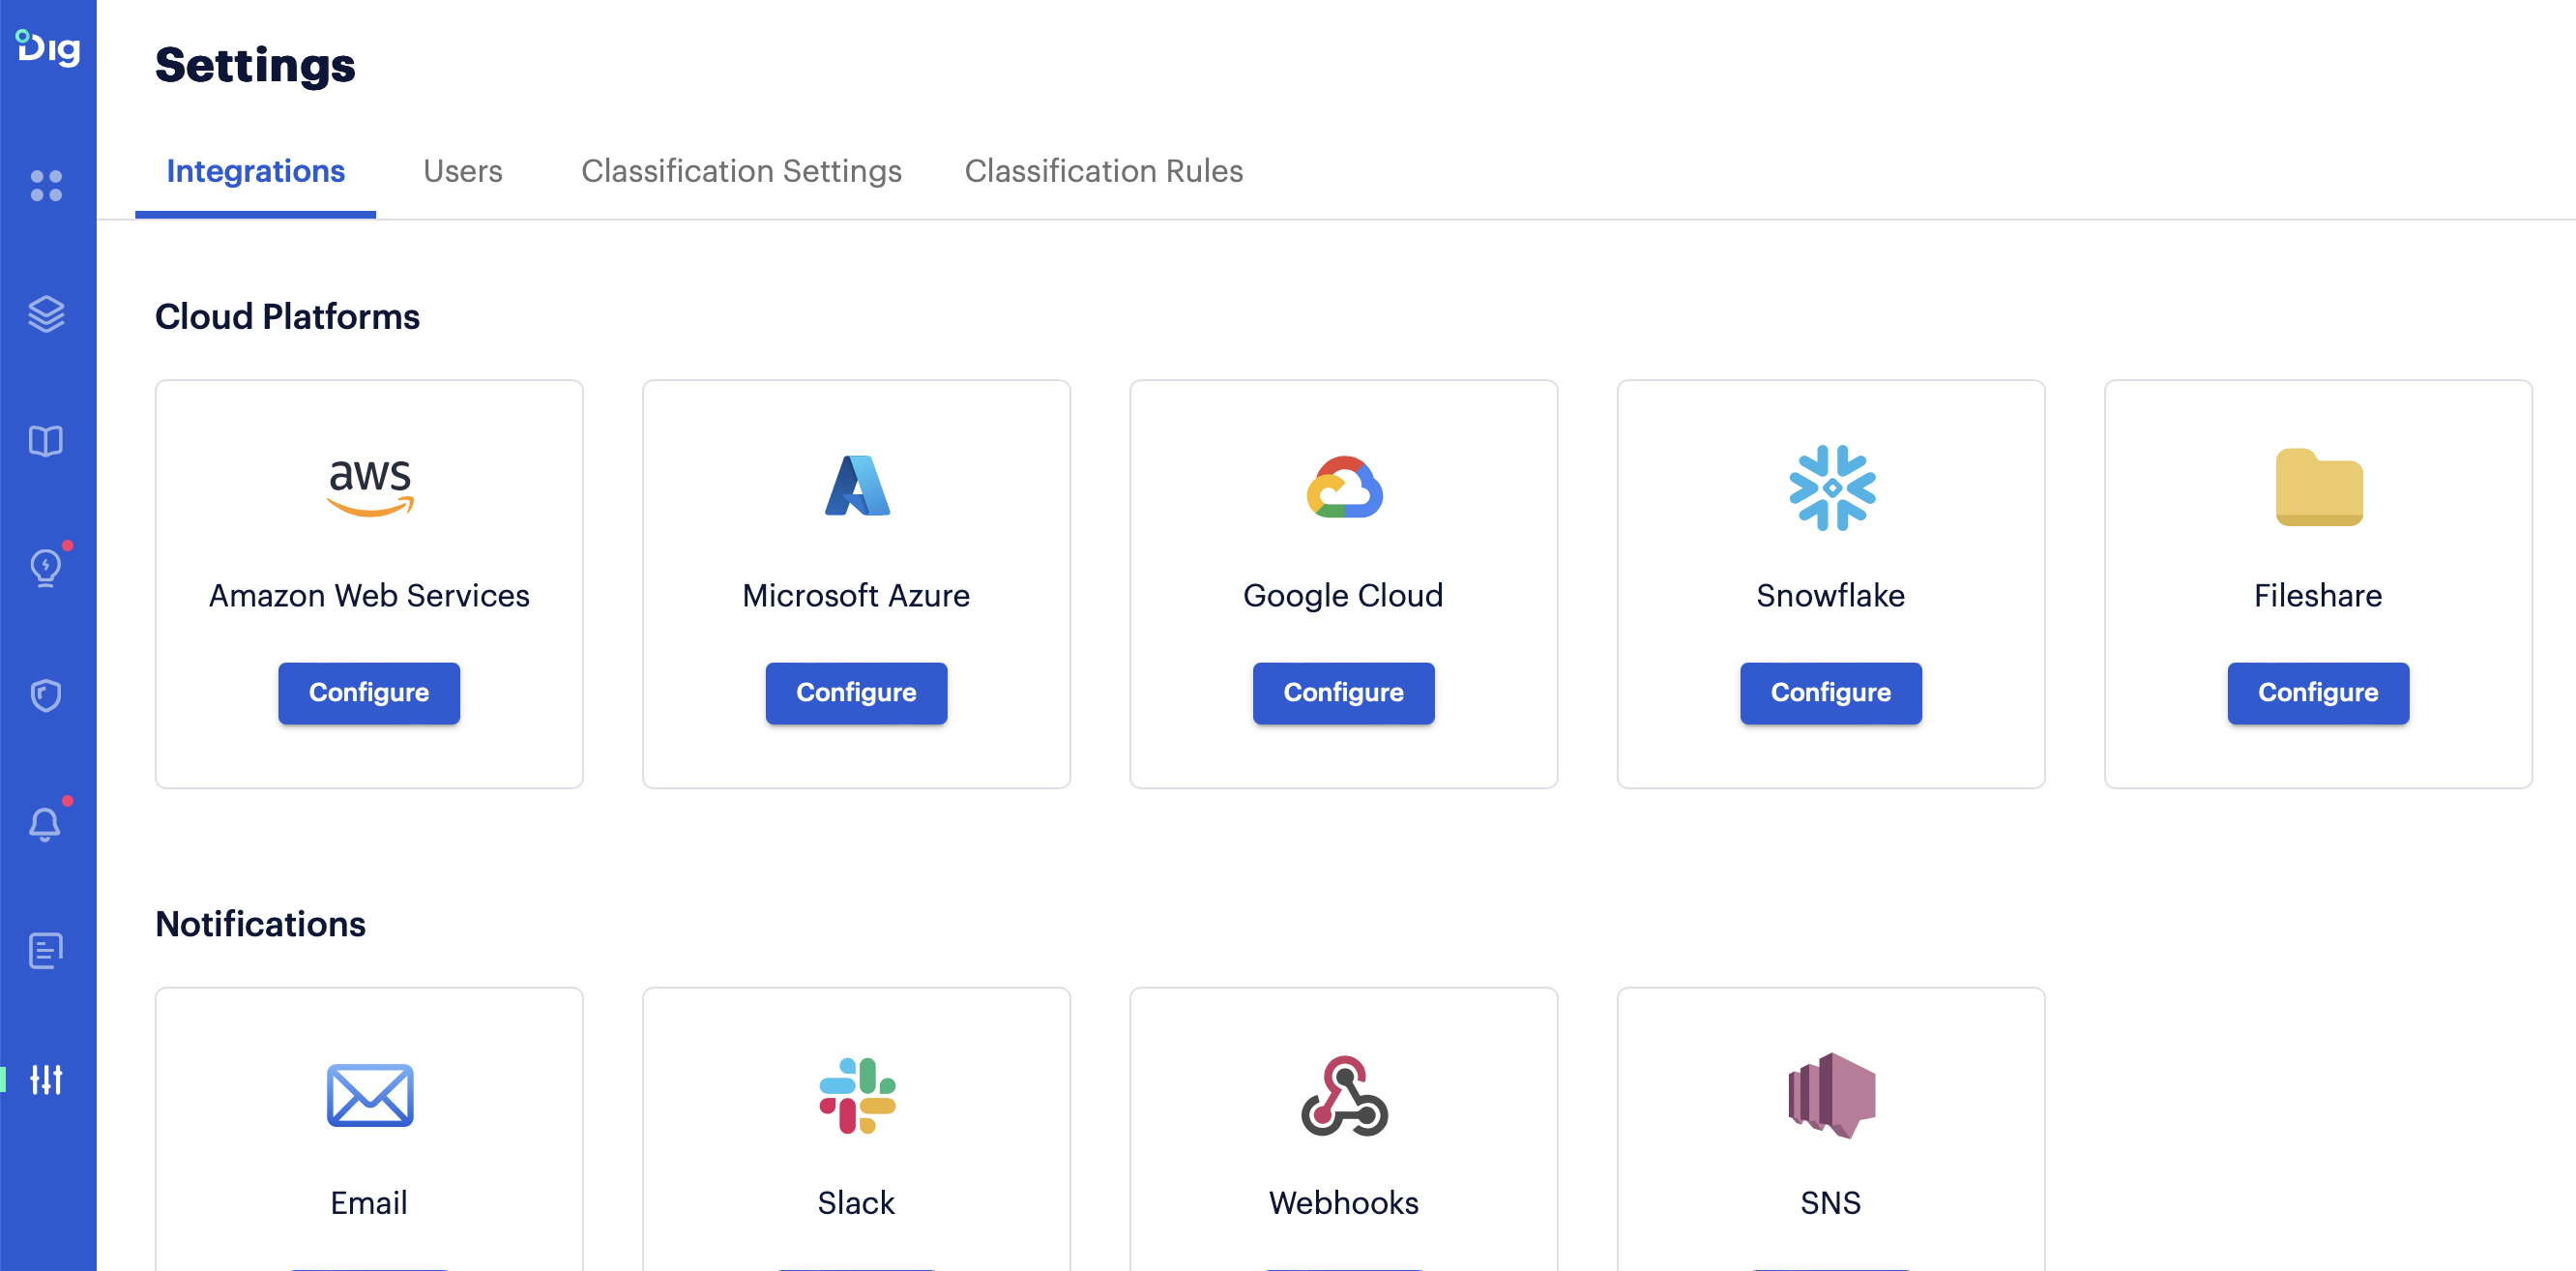
Sign in to your Prisma Cloud DSPM account.
From the left menu, select Settings.
Under Integrations, go to the Cloud Platforms area, select the Fileshare option.

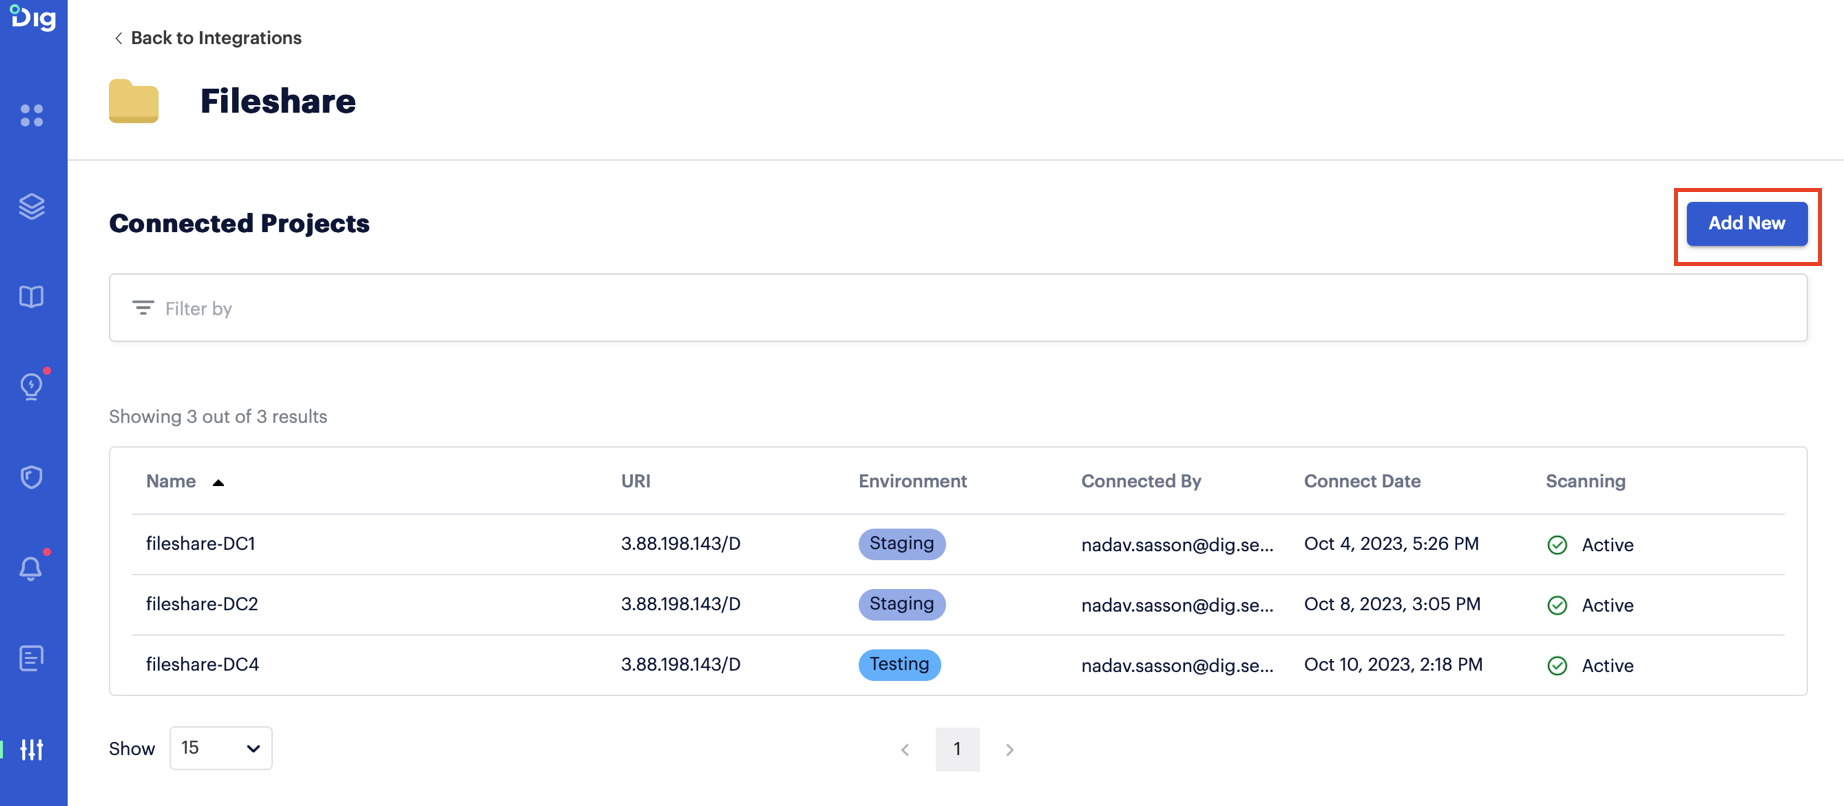
Click Add New.

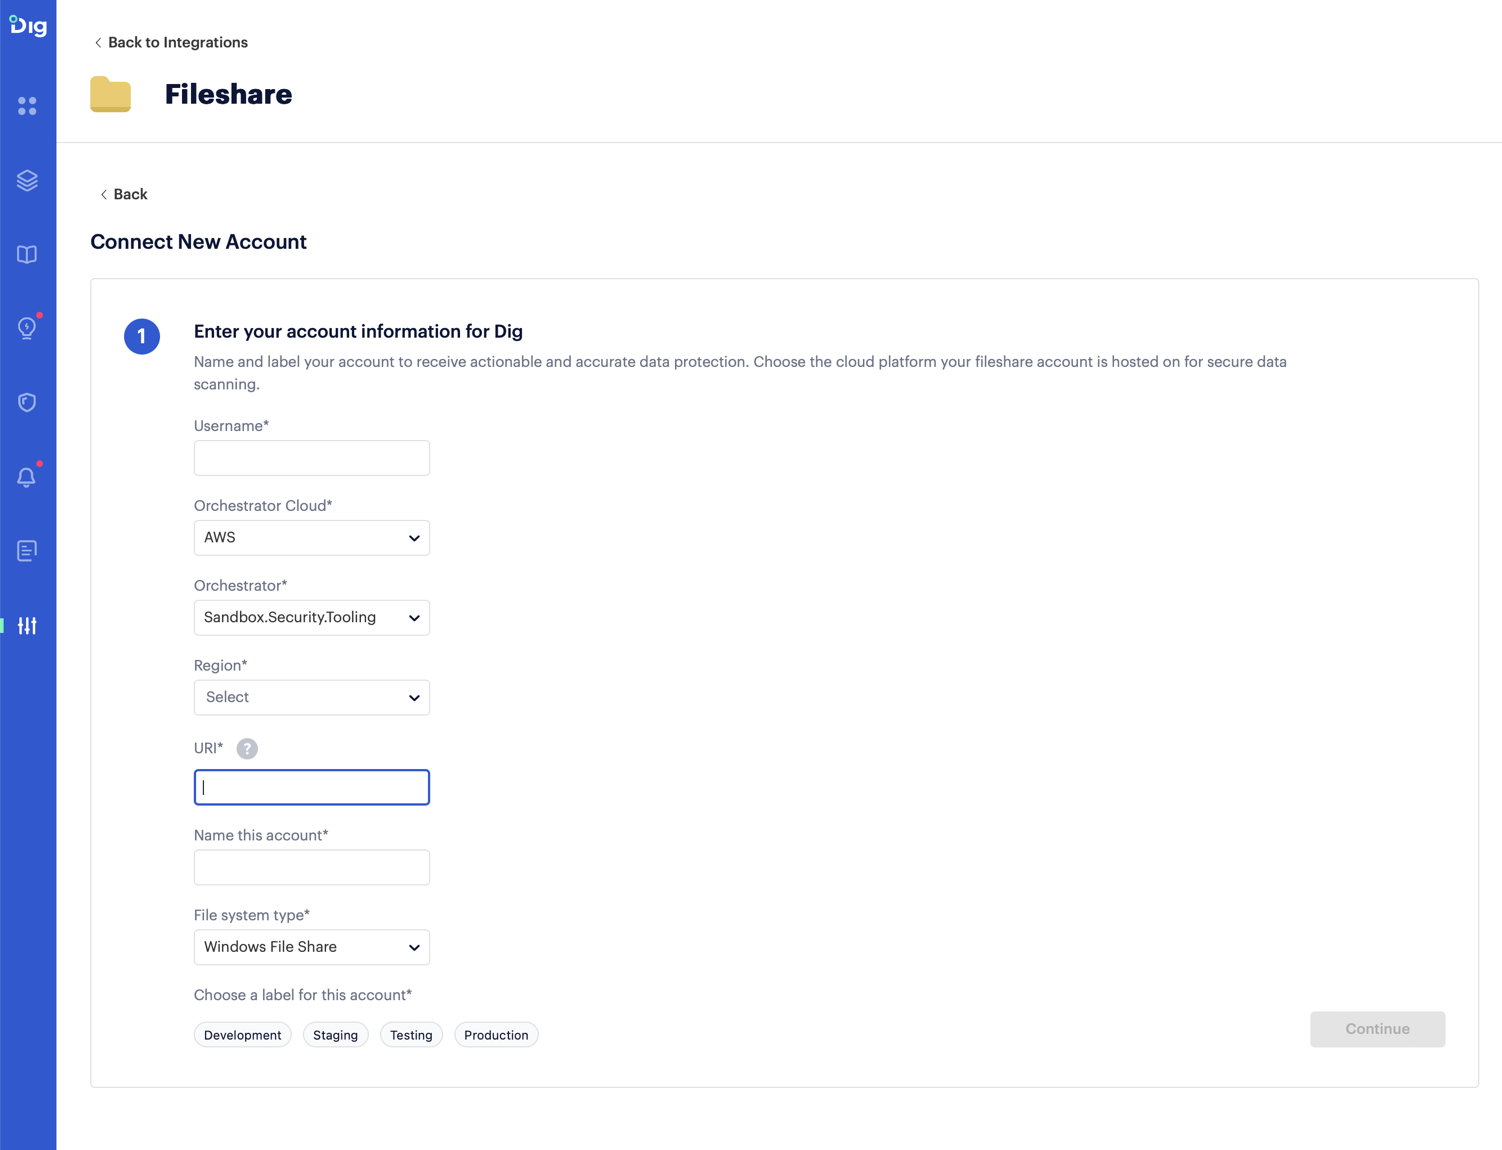
Enter the required details in the form:
Enter the Username corresponding to the Prisma Cloud DSPM user that has been created for this purpose.
Specify the desired Orchestrator Cloud from which the file share is to be scanned.
Indicate the specific Orchestrator that will be utilized for the scanning process.
Select the relevant Region.
Ensure that the URI follows the specified format: <IP of the machine> + ‘/’+ <Share name>.
The entry in the Name this account field is the display name in Prisma Cloud DSPM.
Select the File system type. Presently, only the Windows file system is supported.
Choose a label for the account, for example Development, Staging, or Testing.

Click Continue.
After completing the form, choose one of the following options to safely store the credentials in the cloud secret manager in the chosen Orchestrator project.
Option 1: Use the Prisma Cloud DSPM template to add the password to your cloud secret manager.
Option 2: Use an existing secret if you have already added the password to your cloud secret manager.
Option 1: Use the Prisma Cloud DSPM template to add the password to your cloud secret manager
Generate a secret in the cloud secret manager utilizing a script provided by Prisma Cloud DSPM to store the password for the internal user.
Create the secret.
Make sure to input the password into the correct place.
Click Done.
Prisma Cloud DSPM verifies the connection, and if everything is okay the new account is now listed in your configuration page.
Option 2: Use an existing secret if you have already added the password to your cloud secret manager
Provide Prisma Cloud DSPM with an existing secret from the cloud secret manager that contains the password for the internal user.
Make sure your secret follows the format examples below:
AWS secret ARN:
arn:secretsmanager:<region>:<account-id>:<key-id>Azure key vault ID:
/subscriptions/<subscription-id>/resourceGroups/<resource-group>/providers/Microsoft.KeyVault/vaults/<key-vault>GCP secret ID:
projects/<project-id>/secrets/<secret-id>
Input the secret ID.
Click Done.
Prisma Cloud DSPM verifies the connection.


