- 28 Feb 2024
- 2 Minutes to read
- Print
- PDF
Onboarding GCP
- Updated on 28 Feb 2024
- 2 Minutes to read
- Print
- PDF
Overview
Prisma Cloud DSPM Orchestrator is used to securely detect and classify sensitive information in your environment, while keeping your data in the organization. You can integrate all of your GCP projects with Prisma Cloud DSPM and monitor them using Orchestrator. You can either use a single Orchestrator to monitor all projects, or use multiple Orchestrators in case separation between environments is required.
Onboarding Prisma Cloud DSPM Orchestrator to Your GCP Environment
When integrating a GCP project with Prisma Cloud DSPM for the first time, you need to approve the installation of Orchestrator in your project to enable Prisma Cloud DSPM to monitor your environment.
- Sign in to your Prisma Cloud DSPM account.
- From the left menu, select Settings.
.png)
- Under Integrations, from the GCP option, click Configure .

- In the Add New drop down, opt to add a new account by using either Cloud Shell or by Terraform.

- To continue with the onboarding, click a link below according to your chosen option:
Add a new project using Cloud Shell
- Sign in to the GCP project where you want to install Orchestrator.
 Note
NoteEnsure your project has Administrator privileges and the permissions to create IAM roles and service accounts.
- Enter your Project ID and select a Label for it.

- Select whether you want to use an existing Orchestrator (in which case, you can select the required Orchestrator from the dropdown menu) or deploy a new Orchestrator in this project.
- Click Get CloudShell command.

- From the generated Cloud Shell command, click Copy code snippet.
- Click Open Cloud Shell.
 A GCP console will open in a new tab. Do not close the Prisma Cloud DSPM tab.
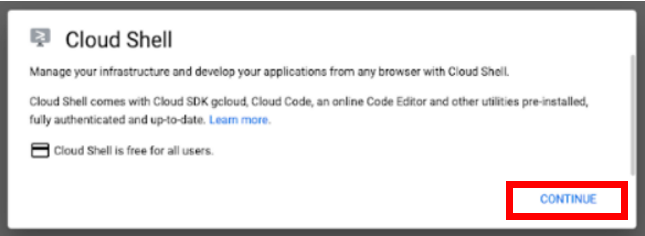
 - From the bottom of the GCP console, under Cloud Shell, click Continue.

- Paste the copied Cloud Shell command into the shell, then click Enter and Authorize.

- Allow the script to run.
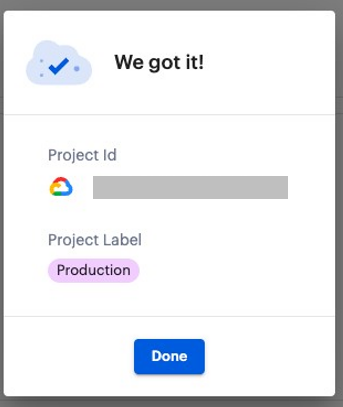
- When the script finishes running, go back to Dig (this tab is automatically refreshed) and click Done.
 The new project is now listed under Connected Projects in your GCP configuration page.
Add a new project using Terraform
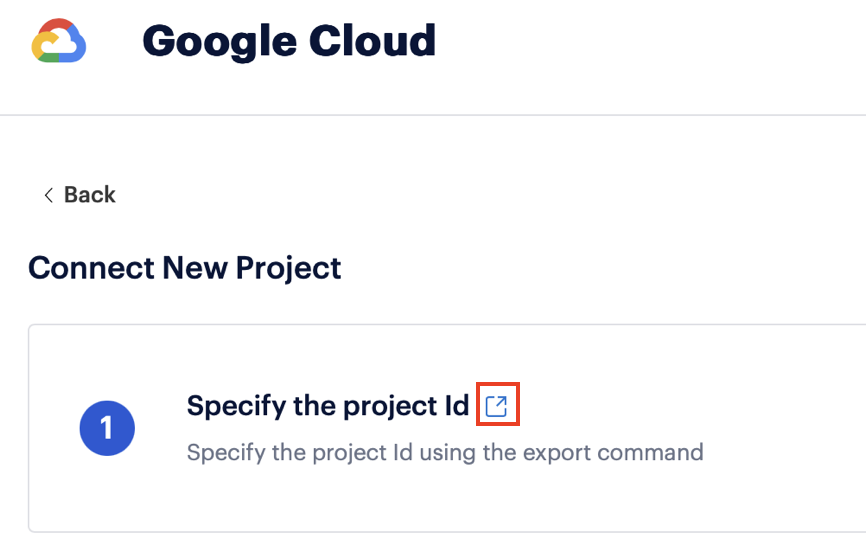
- After choosing to add a new project using Terraform, the Connect New Project window opens
- Specify the project ID using the export command.

- Select whether you want to use an existing Orchestrator (in which case, you can select the required Orchestrator from the dropdown menu) or deploy a new Orchestrator in this project.
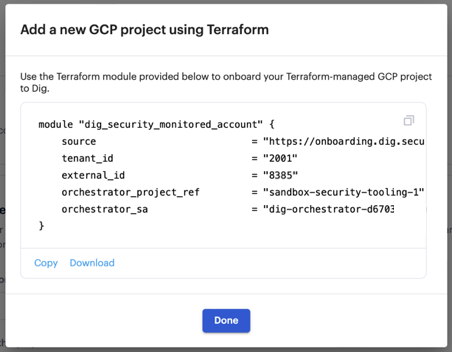
- Click Get Terraform command to generate a Terraform module.


- Click Copy to copy the Terraform module, and click Done.
Important: Do not modify the Terraform module. If the module is modified, Prisma Cloud DSPM cannot provide seamless updates and manage permissions. - Insert the Terraform module into your Terraform pipeline.
- Run the Terraform module. After the module has successfully run, your Terraform-managed GCP account is automatically onboarded into Prisma Cloud DSPM, and listed under Connected Accounts in your GCP configuration page.
Connect additional GCP accounts
After connecting a first GCP account and installing Orchestrator in it, you can connect more GCP accounts that you want to be monitored by Prisma Cloud DSPM. You can either add an existing Orchestrator to monitor all accounts, or install a new Orchestrator for each account.
- Add a new account as described above.
- Select whether you want to use an existing Orchestrator (in which case, you can select the required Orchestrator from the dropdown menu) or deploy a new Orchestrator in this account.
- Click Get Cloud Shell/Terraform command, and add an account by using CloudShell or Terraform. When added, the new account is listed under Connected Accounts in your GCP configuration page.


 A GCP console will open in a new tab. Do not close the Prisma Cloud DSPM tab.

 The new project is now listed under Connected Projects in your GCP configuration page.


